1

Submit form – example php code

This article contains example of simple submit form with control of fulfilment of all fields and valdation. For proper testing of our code is used mercury e-mail server build in in XAMPP environment.

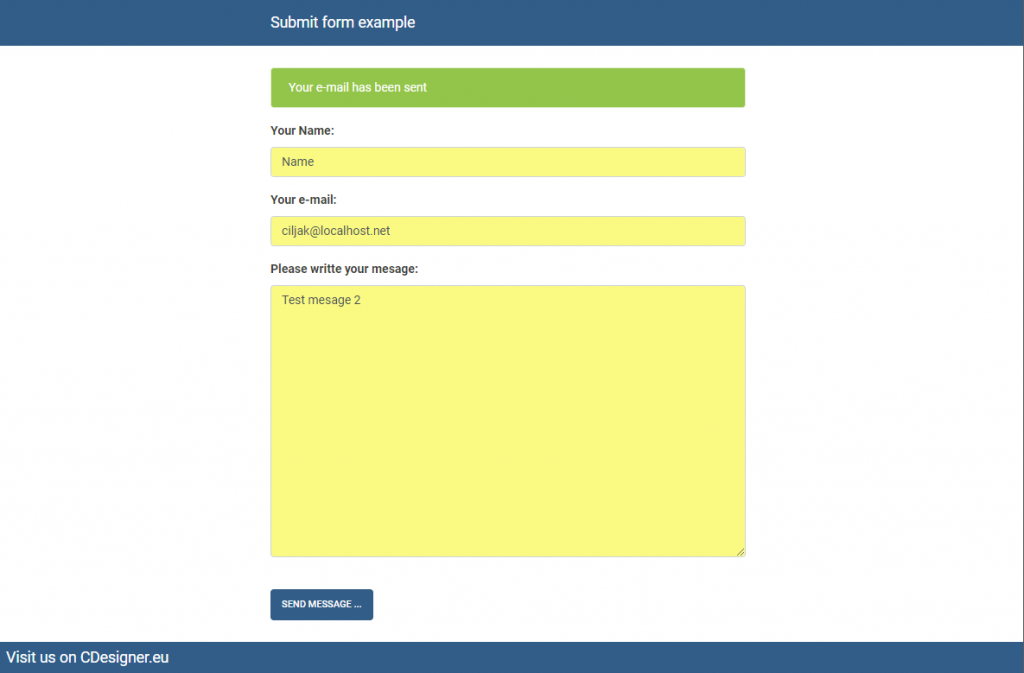
Next picture show visual look of submit form frontend that use bootstrap stylesheet downloaded from https://bootswatch.com/.

Example of our final submit form in php

HTML code part with submiting form consist from

<!– **************************************** –>
<!– HTML code containing Form for submitting –>
<!– **************************************** –>
<!DOCTYPE html>
<html>
<head>
    <title>Contact Form</title>
    <link rel=“stylesheet“ href=“./css/bootstrap.min.css“> 
                                                           <!– bootstrap mini.css file –>
    <link rel=“stylesheet“ href=“./css/style.css“> <!– my local.css file –>
</head>
<body>
    <nav class=“navbar navbar-default“>
      <div class=“container“>
        <div class=“navbar-header“>    
          <a class=“navbar-brand“ href=“index.php“>Submit form example</a>
        </div>
      </div>
    </nav>
    <div class=“container“> 
        <?php if($msg != “): ?>
            <div class=“alert <?php echo $msgClass; ?>“><?php echo $msg; ?></div>
        <?php endif; ?>
    <form method=“post“ action=“<?php echo $_SERVER[‚PHP_SELF‘]; ?>“>
          <div class=“form-group“>
              <label>Your Name:</label>
              <input type=“text“ name=“name“ class=“form-control“ value=“<?
                php echo isset($_POST[‚name‘]) ? $name : “; ?>“>
          </div>
          <div class=“form-group“>
            <label>Your e-mail:</label>
            <input type=“text“ name=“email“ class=“form-control“ value=“<?
              php echo isset($_POST[‚email‘]) ? $email : “; ?>“>
          </div>
          <div class=“form-group“>
            <label>Please writte your mesage:</label>
            <textarea name=“message“ class=“form-control“><?
              php echo isset($_POST[‚message‘]) ? $message : “; ?></textarea>
          </div>
          <br>
          <button type=“submit“ name=“submit“ class=“btn 
            btn-primary“> Send message … </button>
      </form>
    </div>
    
       <div class=“footer“> 
          <a class=“navbar-brand“ href=“https://cdesigner.eu“> Visit us on CDesigner.eu </a>
        </div>
      
</body>
</html>

PHP code grab $_POST[] submited variables, assign them into php code variables and test its content against filtering rules. First test detect content of all needed values as name, e-mail and mesage text. Next verifies e-mail against rules expected from valid e-mails.

If something is missing or e-mail is incorrect red (bootstrap alerted style) highlight in outputed text is used.

Also our code test sucessfull e-mail sending, if sendig finished correct green message display with text

$msg = ‚Your e-mail has been sent‘;       
$msgClass = ‚alert-success‘;             

if sending was unsuccessful red message is displayed

$msg = ‚Your e-mail was not sent‘;                   
 $msgClass = ‚alert-danger‘;

PHP code looks like

<!– ************************************************* –>
<!– PHP „self“ code handling e-mailing submit request   –>
<!– ************************************************* –>
<!–         Code remastered by cdesigner.eu along               –>
<?php
    // two variables for message and styling of the mesage with bootstrap
    $msg = “;
    $msgClass = “;
    // Control if data was submitted
    if(filter_has_var(INPUT_POST, ‚submit‘)){
        // Data obtained from $_POST are assigned to local variables
        $name = htmlspecialchars($_POST[‚name‘]);
        $email = htmlspecialchars($_POST[‚email‘]);
        $message = htmlspecialchars($_POST[‚message‘]);
        // Controll if all required fields was written
        if(!empty($email) && !empty($name) && !empty($message)){
            // If check passed – all needed fields are written
            // Check if E-mail is valid
            if(filter_var($email, FILTER_VALIDATE_EMAIL) === false){
                // E-mail is not walid
                $msg = ‚Please use a valid email‘;
                $msgClass = ‚alert-danger‘;
            } else {
                // E-mail is ok
                $toEmail = ‚ciljak@localhost.org‘; //!!! e- mail address to send to – change for your needs!!!
                $subject = ‚Contact Request From ‚.$name;
                $body = ‚<h2>Contact Request</h2>
                    <h4>Name</h4><p>‘.$name.'</p>
                    <h4>Email</h4><p>‘.$email.'</p>
                    <h4>Message</h4><p>‘.$message.'</p>
                ‚;
                // Email Headers
                $headers = „MIME-Version: 1.0″ .“\r\n“;
                $headers .=“Content-Type:text/html;charset=UTF-8″ . „\r\n“;
                // Additional Headers
                $headers .= „From: “ .$name. „<„.$email.“>“. „\r\n“;
                if(mail($toEmail, $subject, $body, $headers)){
                    // Email Sent
                    $msg = ‚Your e-mail has been sent‘;
                    $msgClass = ‚alert-success‘;
                } else {
                    // Failed
                    $msg = ‚Your e-mail was not sent‘;
                    $msgClass = ‚alert-danger‘;
                }
            }
        } else {
            // Failed – if not all fields are fullfiled
            $msg = ‚Please fill in all contactform fields‘;
            $msgClass = ‚alert-danger‘; // bootstrap format for allert message with red color
        }
    }
?>

Full example code can be obtained from from github location https://github.com/ciljak/phpsubmit .

For proper work of this code you must use appropriate webhosting or use XAMPP with runing mercury e-mail server. After enabling mercury through xamp control-panel go to administration and add new user. In our case we used account with name ciljak. local domain aliases that are posible to use are localhost (can not be validate with this code), localhost.net or localhost.org. Next picture show example of mercury enabled features in XAMPP server

Mercury e-mail server in XAMPP


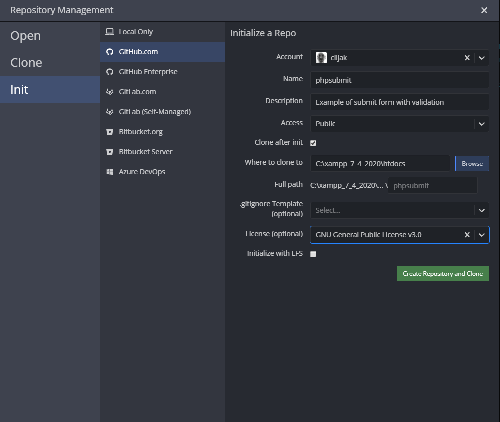
For versioning of our code can be used git with github service. Mouch simpler graphical tool for commiting changes and share your code with team is gitkraken https://www.gitkraken.com/. For further reading please wisit next tutorial.


Our project setup screen in gitkraken looks like next picture

Setup of new project with gitkraken