1

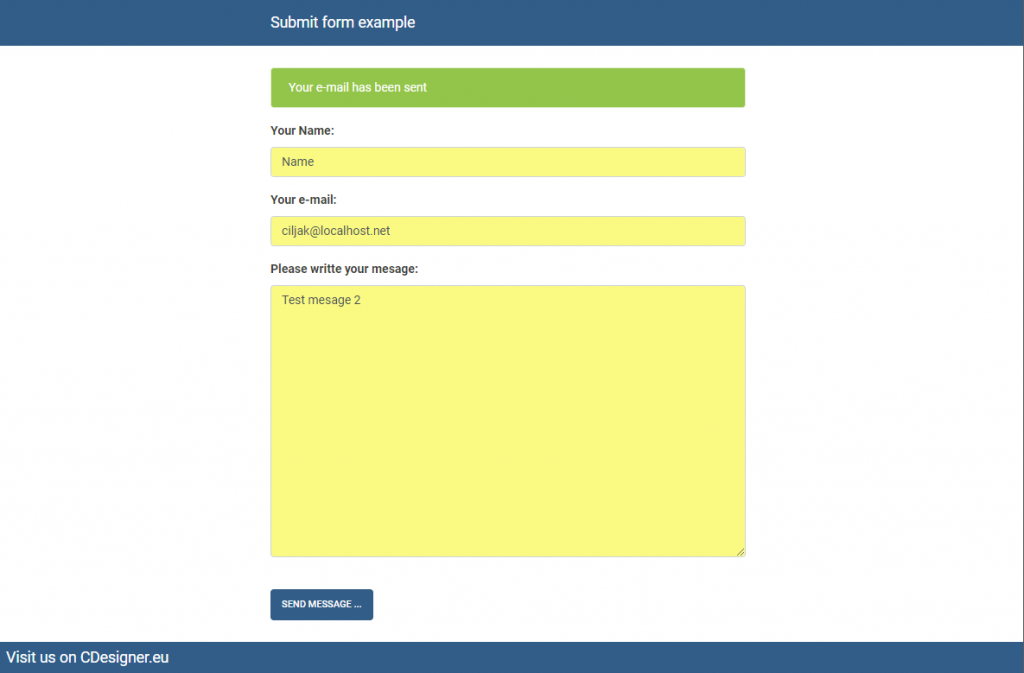
Simple calc – php example code

Example of using form input for two numbers and selection of one of nine possible arithmetic operation or function.

Our php application frontend is on next picture:

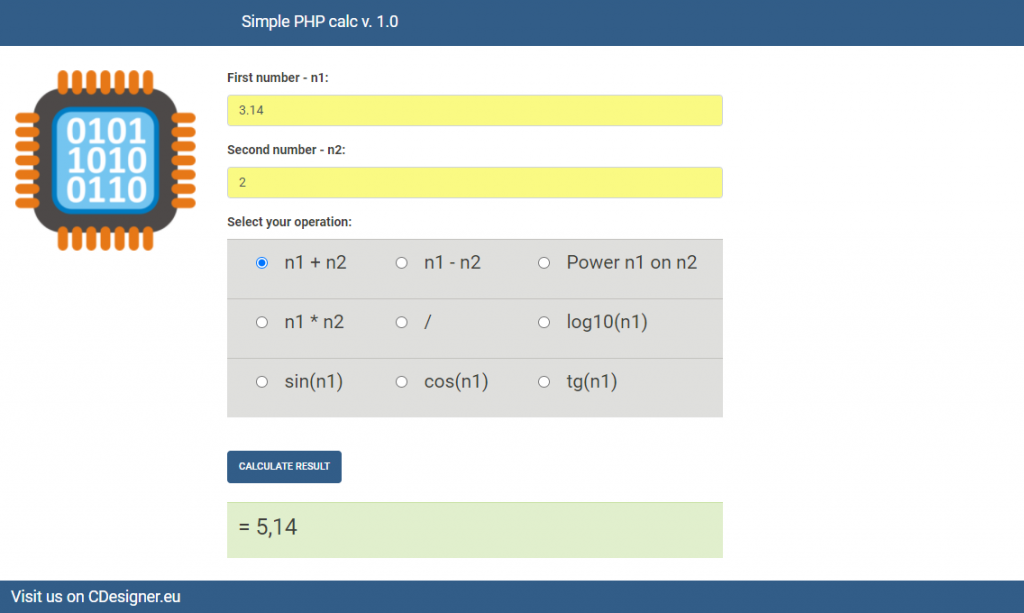
Our code is located in one index.php file and consist from:

  • HTML part with input form – obtain data from user, contain submit button and last part show result in two posiblle way. If there is no error message and result ist generated, then well formatted number (2 decimal numbers) is shown. Else (if number was not calculated and result is not prepared or error output message was set) warning text of red color take output (formating is created with alert message of bootstrap linked style).
  • PHP code – obtain numbers from submitted post form, controll if data available with filter_has_var(); prevent for injecting sql with simple htmlspecialchars($_POST[‚nr1‘]); and calculate result along submitted $operator = htmlspecialchars($_POST[‚operation‘]); . As demonstration for controll of user inputed data dividing by zero check take place.

Form code part of index.php follow.

<form method=“post“ action=“<?php echo $_SERVER[‚PHP_SELF‘]; ?>“>
          <div class=“form-group“>
              <label>First number – n1:</label>
              <input type=“text“ name=“nr1″ class=“form-control“ value=“<?
                    php echo isset($_POST[‚nr1‘]) ? $nr1 : ‚0‘; ?>“>
          </div>
          <div class=“form-group“>
            <label>Second number – n2:</label>
            <input type=“text“ name=“nr2″ class=“form-control“ value=“<?
            php echo isset($_POST[‚nr2‘]) ? $nr2 : ‚0‘; ?>“>
          </div>
          
          <div class=“form-group“>
              <label>Select your operation:</label> <br>
              <table class=“table table-secondary „>
                <tr>
                    <td>
                    <input class=“inputSelector“ type=“radio“ id=“+“ name=“operatio
                      n“ value=“+“  checked> 
                    <label> <h4> n1 + n2 </h4></label>
                    </td>
                    <td>
                    <input class=“inputSelector“ type=“radio“ id=“-
                     “ name=“operation“ value=“-“  <?php echo ($operator == „-„) ?
                       „checked“ : “; ?> >  
                    <label><h4> n1 – n2</h4></label>
                    </td>
                    <td>
                    <input class=“inputSelector“ type=“radio“ id=“Power“ 
                     name=“operation“ value=“Power“  <?php echo ($operator ==
                     „Power“) ? „checked“ : “; ?> > 
                    <label><h4> Power n1 on n2 </h4></label> 
                    </td>
               </tr>
                <tr>        
                    <td>
                    
                    <input class=“inputSelector“ type=“radio“ id=“*“ 
                   name=“operation“ value=“*“  <?php echo ($operator == „*“) ?
                   „checked“ : “; ?>  >  
                    <label><h4> n1 * n2</h4></label>
                    </td>
                    <td>
                    <input class=“inputSelector“ type=“radio“ id=“/“ name=“operation
                     “ value=“/“  <?php echo ($operator == „/“) ? „checked“ : “; ?> > 
                    <label><h4>/</h4></label> 
                    </td>
                    <td>
                    <input class=“inputSelector“ type=“radio“ id=“Log10″ 
                      name=“operation“ value=“Log10″  <?php echo ($operator ==
                      „Log10“) ? „checked“ : “; ?> >  
                    <label><h4>log10(n1)</h4></label>
                    </td>
                </tr>   
                <tr>        
                    <td>
                    <input class=“inputSelector“ type=“radio“ id=“sin“ 
                     name=“operation“ value=“sin“  <?php echo ($operator == „sin“) ?
                     „checked“ : “; ?>  >  
                    <label><h4> sin(n1)</h4></label>
                    </td>
                    <td>
                    <input class=“inputSelector“ type=“radio“ id=“cos“ 
                      name=“operation“ value=“cos“  <?php echo ($operator == „cos“)
                        ? „checked“ : “; ?> > 
                    <label><h4>cos(n1)</h4></label> 
                    </td>
                    <td>
                    <input class=“inputSelector“ type=“radio“ id=“tg“ 
                     name=“operation“ value=“tg“  <?php echo ($operator == „tg“) ?
                      „checked“ : “; ?> >  
                    <label><h4>tg(n1)</h4></label>
                    </td>
                </tr>   
              </table>
            </div>
          <br>
          <button type=“submit“ name=“submit“ class=“btn btn-primary“> Calculate result </button>
          <?php   //($is_result == „true“) ? {          
                
                 if ($is_result && $msg == “) {
                    $result = number_format($result, 2, ‚,‘, ‚ ‚); // formating number refer to https://www.php.net/manual/en/function.number-format.php
                        echo „<br> <br>“;
                         echo “ <table class=\“table table-success\“> „;
                        echo “ <tr>
                               <td><h3> = $result</h3> <td>
                              </tr> „; 
                              echo “ </table> „;
                    
                    
                } ; 
                 ?>
                 <br>
                    
                     
                    <?php if($msg != “): ?>  <!– This part show error or warning message if one of the operand does not meet calculations requirements – dividing by zero –>
                        <br><br>    
                    <div class=“alert <?php echo $msgClass; ?>“><?php echo $msg; ?></div>
                    <?php endif; ?>
                    
      </form>

PHP code for result calculation follow

<?php
    // two variables for message and styling of the mesage with bootstrap
    $msg = “;
    $msgClass = “;
    // default values of auxiliary variables
    $operator = “; // at the beggining is no operator selected
    $is_result = „false“; //before hitting submit button no result is available
    $result = 0; // result and boath number are by default at zero values initialized
    // Control if data was submitted
    if(filter_has_var(INPUT_POST, ‚submit‘)){
        // Data obtained from $_POST are assigned to local variables
        $nr1 = htmlspecialchars($_POST[‚nr1‘]);
        $nr2 = htmlspecialchars($_POST[‚nr2‘]);
        $operator = htmlspecialchars($_POST[‚operation‘]); 
        
        $is_result = „true“;
        // calculation of appropriate results
        /* if ($operator == „+“) {          
            $result = $nr1 + $nr2;     
        };
        if ($operator == „-„) {          
            $result = $nr1 – $nr2;     
        };
        if ($operator == „*“) {          
            $result = $nr1 * $nr2;     
        };
        if ($operator == „/“) {          
            $result = $nr1 / $nr2;     
        };
        */
        //this part can be reworked for switch command for educational purposes like this
        switch ($operator) {
          case „+“: {          
                       $result = $nr1 + $nr2;     
                    }; break;
          case „-„: {          
                        $result = $nr1 – $nr2;     
                     }; break;
          case „*“: {          
                        $result = $nr1 * $nr2;     
                     }; break;
          case „/„: {   
                        if ($nr2 != 0)  { //dividing by zero mittigation, if nr2 is zero then
                                                      error message is outputed
                            $result = $nr1 / $nr2;
                            $msg = “;} 
                            else { 
                                $msg = ‚Dividing by zero NaN‘; // text of the message
                                $msgClass = ‚alert-danger‘; // bootstrap type alert-
                                                                                       danger is outputed
                             } ;  
                             
                     }; break;  
          case „Power“: {          
                        $result = Pow($nr1, $nr2);     
                     }; break;  
          case „Log10“: {          
                        $result = Log10($nr1);     
                     }; break;  
          case „sin“: {          
                        $result = sin($nr1);     
                     }; break;  
          case „cos“: {          
                        $result = cos($nr1);     
                     }; break;  
          case „tg“: {          
                        $result = tan($nr1);     
                     }; break;                       
        };
        
    }
?>
 

For main formating was used bootstrap code obtained from https://bootswatch.com/.

Small altering is created by own style.css that follow

.navbar  {
    background-color: #325d88;
    margin-bottom: 25px ;
    
}
.navbar-brand {
   
    color: white;
}
/* set midle container to width 580px */
.container {
   
    width: 580px;
    margin-left: 240px;
  
}
/* add margin to both sides in calculator input fields */
.inputSelector {
   
    
    margin-left: 20px;
    margin-right: 15px;
  
}
/* colorizing backround and change font-size of input number fields n1 and n2 partialy alter bootstrap css */
.form-control {
   
    background-color: rgb(250, 250, 131);
    font-size:25px
}
/* aboolute positioning of image on calc frontend – on left side */
#calcimage {
   
    position: absolute;
  top: 80px;
  left: 20px;
  right: 0;
  
  
}
/* change wight of label text before input field of form */
label {
   
    font-weight: bold;
}
.footer {
    background-color: #325d88;
    margin-top: 25px;
    padding-left: 15px;
    height: auto;
    
}

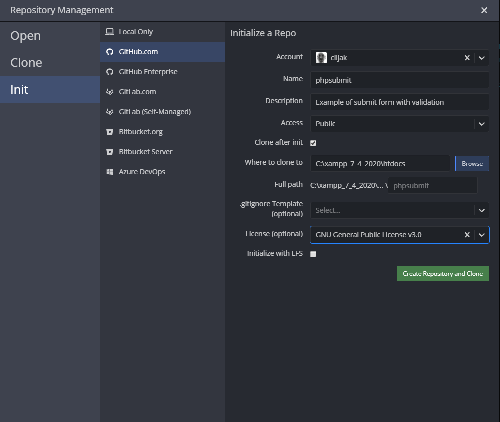
Full code for further study can be obtained from github here.


MMU models slicing with PrusaSlicer and Prusa MMU2S

This article go step by step in proces of slicing Multi Material 3D model with PrusaSlicer with focus on appropriate extruder assignment, objects placement and check for correct layer placement.

First tips for MMU prints

After some time of using multimaterial upgrade MMU2S for Prusa i3 MK3S printer i can offer this example workflow for seamless MMU prints.

Best MMU material for MMU print for me is PETG. Filament is tought and mechanical resistant, gears does not demage it during permanent loading and unloading proces. Number of outer intervence is minimal. Something worse ist ABS but because it thermal sensitivity is appropriate for almost 2D prints (bookmarks, logos, …). Worst material is PLA, is beter dont use it because it low melting point and bad mechanical resistance (gears can easy demage it).

At the begining we can prepare our own model (this for interesting bookmarks or another logos can describe in another article) or download one from web.

Very important is, that full model must be divided in separate parts of appropriate colors that lays on on top of another or on one basement object. Very important is that they dont interfere one by another. And they must lay in way that one objects layer is on the top of another layer. There can not be any one free layer, because all final print will be demaged.

Selection of exercise modell

For our exercise we download model https://www.thingiverse.com/thing:3689802 from thingiverse. If you are interested for other models, please visit selection https://www.thingiverse.com/ciljak/collections/mmu .

After download unpack .zip file and run PrusaSlicer (this description use version 2.2).

For basic setup must be done:

  • Selected quality – for good results select 0.15mm QUALITY
  • In section Printer select Original Prusa i3 MK3S MMU2S – if not awayable, please go through printer add wizard and instal printer with MMU upgrade (now we have option for MMU single or MMU as we selected on our next picture)
  • For all filaments select appropriate type and color of filament for visualisation (keep in mind that on the top is filament 1 and bottom filament 5, in this order with correct color they must be loaded into MMU2S upgrade on the printer)
  • Optionaly select supports or brim for better setling of the model

Before next step, we must look at our model and recognize what part is base on top of their are other parts added. In our exmple it is orange part. This part can be drag and drop into space of slicer. Other parts are added on the top and tne create final MMU composit.

After import of first (base) orange part, we must rightclick on the object and select extruder with appropriate filament, in our case it is extruder 5 with orange filament.

In next step we must switch on expert settings and on object pane (right bottom layered part) we click on add option (with sign + in circle). Next select add part and load one of remaining parts from disk. Our downloaded files are named by color in spanish, but it can be recognized or translated and refered with picture of modell on thingiverse.

After adding first part, use rightclick on selected part and change extruder to appropriate color. Repeat his steps – add, change extruder to appropriate color until last part of model.

Optionaly you can change position of wipe tower. You can also rotate and change width of tower for better workflow of objects on headbed.

Tips and tricks


Important notice: Before final slicing, look at tab Filament settings and check if corect type of filament is selected. After initial opening od PrusaSlicer default settings was for PLA. We changet filaments for appropriate extruders but this selection does not automaticaly changed type of filaments. You must do it manualy, it was one of me big mistakes with new MMU upgrade.


Important things to check after slicing: Slide with layer selector an check all color layer changes. On one layer can not be two or more materials with different colors in same place. Also one layer by another there can not be a free layer.

If you work on simple objects as bookmark or another promotional item it can by calculated that 4 layer with width of 0.15mm are together high 0.6mm. next added objedct (logo or text) must have their z axis on 0.6mm. And if this text or logo will have 3 layers it must have 0.45mm high because 0.45/0.15 is number 3.


Next picture show fully prepared MMU objects.

Prepared PrusaSlicer file can be downoladed for further study from here.


Tip for you: MMU can produce large waste of material when is used for large 3D ojects but it can be economical if you use it for some marketing things as bookmarks and logos of a company. Think about it before preparing model. Wery good scenario is singlecolor base and next logos and text with only few layer.


Revell Titanic 100th aniversary – backlighting gallery

This article contains fotogallery and youtube videos from backlighting plastic model of Revell Titanic 100th aniversary.


Titanic 100th aniversary by Revell
Upper deck
Assembling parts
Electronic part assembling and testing
Expansion shield for power boost with TIP120
Another look at expansion shield for arduino
Arduino Mega 2560 with protyping shield
IUpper loog at protyping shield
Bottom exhaust of electrical cabling - usb cable
Black mate for elimination of light leakage
Night look at fully assembled model
Inner look at one of many decks on Titanic model
Befor adding upper decks
Top look
Front part of fully assembled model
Middle part of model
Back part of model
Driled holes with backlight
Side look at final model
Titanic 100th aniversary by Revell

Next video depicts process of assembling plastig model with appropriate stages of electronics assembling.

Preview of finaly assemled model with remote IR control show next video.

Final version of program code is available for download here.


Submit form – example php code

This article contains example of simple submit form with control of fulfilment of all fields and valdation. For proper testing of our code is used mercury e-mail server build in in XAMPP environment.

Next picture show visual look of submit form frontend that use bootstrap stylesheet downloaded from https://bootswatch.com/.

Example of our final submit form in php

HTML code part with submiting form consist from

<!– **************************************** –>
<!– HTML code containing Form for submitting –>
<!– **************************************** –>
<!DOCTYPE html>
<html>
<head>
    <title>Contact Form</title>
    <link rel=“stylesheet“ href=“./css/bootstrap.min.css“> 
                                                           <!– bootstrap mini.css file –>
    <link rel=“stylesheet“ href=“./css/style.css“> <!– my local.css file –>
</head>
<body>
    <nav class=“navbar navbar-default“>
      <div class=“container“>
        <div class=“navbar-header“>    
          <a class=“navbar-brand“ href=“index.php“>Submit form example</a>
        </div>
      </div>
    </nav>
    <div class=“container“> 
        <?php if($msg != “): ?>
            <div class=“alert <?php echo $msgClass; ?>“><?php echo $msg; ?></div>
        <?php endif; ?>
    <form method=“post“ action=“<?php echo $_SERVER[‚PHP_SELF‘]; ?>“>
          <div class=“form-group“>
              <label>Your Name:</label>
              <input type=“text“ name=“name“ class=“form-control“ value=“<?
                php echo isset($_POST[‚name‘]) ? $name : “; ?>“>
          </div>
          <div class=“form-group“>
            <label>Your e-mail:</label>
            <input type=“text“ name=“email“ class=“form-control“ value=“<?
              php echo isset($_POST[‚email‘]) ? $email : “; ?>“>
          </div>
          <div class=“form-group“>
            <label>Please writte your mesage:</label>
            <textarea name=“message“ class=“form-control“><?
              php echo isset($_POST[‚message‘]) ? $message : “; ?></textarea>
          </div>
          <br>
          <button type=“submit“ name=“submit“ class=“btn 
            btn-primary“> Send message … </button>
      </form>
    </div>
    
       <div class=“footer“> 
          <a class=“navbar-brand“ href=“https://cdesigner.eu“> Visit us on CDesigner.eu </a>
        </div>
      
</body>
</html>

PHP code grab $_POST[] submited variables, assign them into php code variables and test its content against filtering rules. First test detect content of all needed values as name, e-mail and mesage text. Next verifies e-mail against rules expected from valid e-mails.

If something is missing or e-mail is incorrect red (bootstrap alerted style) highlight in outputed text is used.

Also our code test sucessfull e-mail sending, if sendig finished correct green message display with text

$msg = ‚Your e-mail has been sent‘;       
$msgClass = ‚alert-success‘;             

if sending was unsuccessful red message is displayed

$msg = ‚Your e-mail was not sent‘;                   
 $msgClass = ‚alert-danger‘;

PHP code looks like

<!– ************************************************* –>
<!– PHP „self“ code handling e-mailing submit request   –>
<!– ************************************************* –>
<!–         Code remastered by cdesigner.eu along               –>
<?php
    // two variables for message and styling of the mesage with bootstrap
    $msg = “;
    $msgClass = “;
    // Control if data was submitted
    if(filter_has_var(INPUT_POST, ‚submit‘)){
        // Data obtained from $_POST are assigned to local variables
        $name = htmlspecialchars($_POST[‚name‘]);
        $email = htmlspecialchars($_POST[‚email‘]);
        $message = htmlspecialchars($_POST[‚message‘]);
        // Controll if all required fields was written
        if(!empty($email) && !empty($name) && !empty($message)){
            // If check passed – all needed fields are written
            // Check if E-mail is valid
            if(filter_var($email, FILTER_VALIDATE_EMAIL) === false){
                // E-mail is not walid
                $msg = ‚Please use a valid email‘;
                $msgClass = ‚alert-danger‘;
            } else {
                // E-mail is ok
                $toEmail = ‚ciljak@localhost.org‘; //!!! e- mail address to send to – change for your needs!!!
                $subject = ‚Contact Request From ‚.$name;
                $body = ‚<h2>Contact Request</h2>
                    <h4>Name</h4><p>‘.$name.'</p>
                    <h4>Email</h4><p>‘.$email.'</p>
                    <h4>Message</h4><p>‘.$message.'</p>
                ‚;
                // Email Headers
                $headers = „MIME-Version: 1.0″ .“\r\n“;
                $headers .=“Content-Type:text/html;charset=UTF-8″ . „\r\n“;
                // Additional Headers
                $headers .= „From: “ .$name. „<„.$email.“>“. „\r\n“;
                if(mail($toEmail, $subject, $body, $headers)){
                    // Email Sent
                    $msg = ‚Your e-mail has been sent‘;
                    $msgClass = ‚alert-success‘;
                } else {
                    // Failed
                    $msg = ‚Your e-mail was not sent‘;
                    $msgClass = ‚alert-danger‘;
                }
            }
        } else {
            // Failed – if not all fields are fullfiled
            $msg = ‚Please fill in all contactform fields‘;
            $msgClass = ‚alert-danger‘; // bootstrap format for allert message with red color
        }
    }
?>

Full example code can be obtained from from github location https://github.com/ciljak/phpsubmit .

For proper work of this code you must use appropriate webhosting or use XAMPP with runing mercury e-mail server. After enabling mercury through xamp control-panel go to administration and add new user. In our case we used account with name ciljak. local domain aliases that are posible to use are localhost (can not be validate with this code), localhost.net or localhost.org. Next picture show example of mercury enabled features in XAMPP server

Mercury e-mail server in XAMPP


For versioning of our code can be used git with github service. Mouch simpler graphical tool for commiting changes and share your code with team is gitkraken https://www.gitkraken.com/. For further reading please wisit next tutorial.


Our project setup screen in gitkraken looks like next picture

Setup of new project with gitkraken


Križík T565 – vacuum tube analog oscilloscope

The T565A oscilloscope is a universal device for observing voltage waveforms from the lowest frequencies (DC voltages) up to 2 MHz. It can monitor periodic and non-periodic (transient) events with a voltage of 10 mV to 500 V. The large frequency range of amplifiers and time base allows extensive use of the T565A oscilloscope in various fields, such as. in radio engineering, low-current and high-current electrical engineering, in physics, chemistry, biology, both in research and in operation. In all these applications, the possibility of measuring the observed voltages is fully applied.

Schematic and device description in czech language can be obtained from here.


Krátka videoukážka zobrazuje odkrytované zariadenie v prevádzkovom stave.


Vacuum tube tester Tesla BM215

Vacuum tube tester Tesla BM215 is well know testing device used in supply shops in socialistic Czechoslovakia. For further reading you can visit pages http://www.oldradio.cz/meraky/bm215.htm .

Photogallery of my device during cleaning process and first mesaurment:


List of mesaurment cards is available from link http://www.oldradio.cz/meraky/bm215/karty001.htm . For new or some exotic types of vacuum tubes can be used online generator of mesaurment cards http://sroll.net/ok1srd/technika/bm215/.

Next video show mesaurment device in partialy disasembled state.


Showcase of multimaterial 3D prints


MMU2S kit assembling

This article contains photogallery from building the prusa MMU2S multimaterial upgrade kit.

Whole building process can be refered from official site here and consist from these main parts:

  • existing printer extruder upgrade
  • filament selector part assembly
  • final binding and electronics interconnection between printer prusa i3 MK3S and multimaterial upgrade prusa MMU2S


Multimaterial upgrade MMU2S for 3D printer prusa i3 MK3S

Creating a color model can be accomplished using several methods. In amateur work, the simplest but also the most workable solution is to print the original from white material and then paint it with a brush or airbrush.

In the case of fully automated machine 3D printing, two possible solutions are possible. The first, more expensive solution is to use several separate extruders. In this case, we eliminate the jamming of the filament in the feed path of the extruder, the perfection of the registration is problematic as well as in conventional offset printing.

The second cheaper solution uses a single extruder and a system for feeding print filaments from multiple sources. The second category also includes the so-called multimaterial upgrade for 3D printer Prusa i3 MK3S with designation MMU2.

MMU2S – the second generation of multimaterial printing extensions from Prusa research to the Prusa i3 MK3S printer. The homepage with the option to order via the e-shop is here.

It is clear from the previous video that we can use a total of 5 different materials for printing. As an interesting additional feature, the upgrade allows:

  • effective printing of water-soluble support materials (they will be used due to their price only on a thin layer, which will ensure a smooth separation of the support),
  • pressing of material residues on individual printing spools.

The procedure of assembling the supplied kit can be seen e.g. on video:

We have to prepare the model for printing so that each color will represent a separate .stl model. Before the first import, we must call up the option in PrusaSlicer (download here) via the Printer menu of the option to add a printer according to the following image:

First we add and place the first model, then all the others.
A brief procedure can be seen in the video from the upgrade creator in the following video:


Gallery of 3D prints

Schowcase of my scuccessfull 3d prints contain next photogallery. As inspiration for my prints was used: