GNS3 for our VoIP home training lab


Basic simulation element for our sw based home training lab will be GNS 3 simulator. But question is, what it is GNS3 simulator. Best description we found at www.gns3.org: “ GNS3 is a FREE graphical network simulator that allows simulation of complex networks without the need to purchase network hardware. „
There will arisen second questions: Is it free? And answer is yes and no – application is free bud as they say: “ Users have to provide their own IOS/IPS/PIX/ASA/JunOS to use with GNS3. GNS3 does not include IOS images – these are copyrighted and are the property of Cisco Systems and other copyright holders. “ , www.gns3.org, 4.12.11
We will assume that you have appropriate IOS images from your cisco pages and are correctly licensed now.
Great video about obtaining GNS3 and take basic setup is provided by project homepage: http://www.gns3.org/2011/09/video-how-to-download-install-and-get-working-gns3/. One of the most important thing is run virtualized IOS and calculate Idle PC value that are important for resource management of hosting PC. If you ignore this step, GNS simulator with only one running router will consume your whole pc computing resources (full load your system).
Before we start with basics voice simulations, i will introduce one great simulation component that enable us interconnect virtualized network environment with existing resources on our pc-s ore our home network.
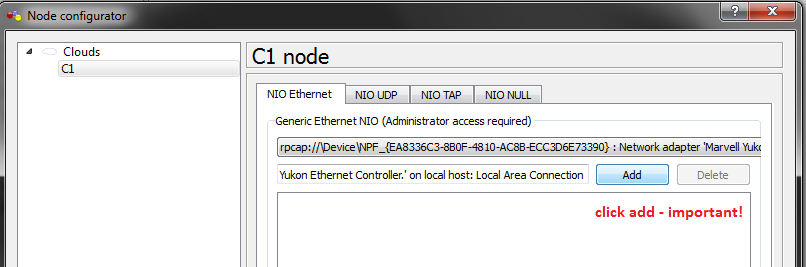
This component is cloud and can be added this way
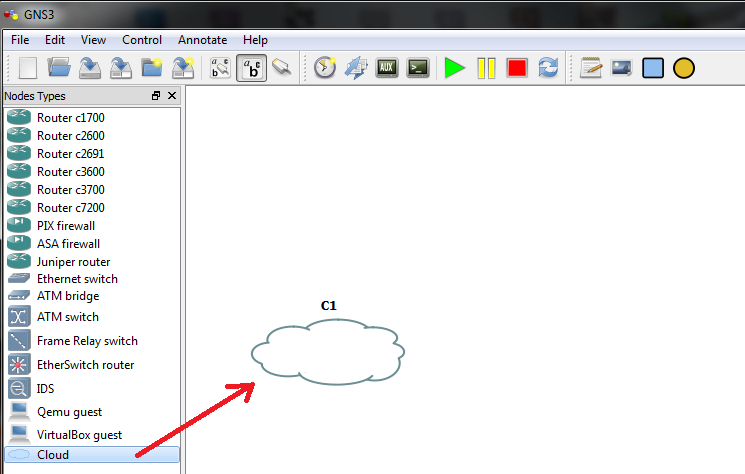
For proper configuration right click on cloud in topology pane and

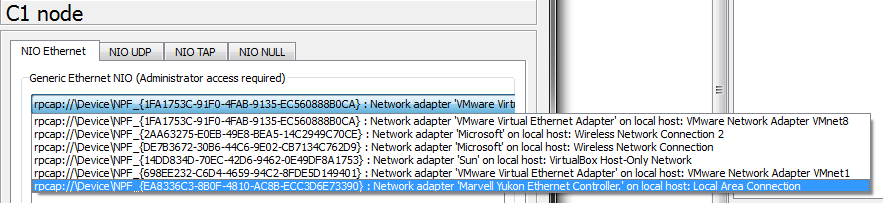
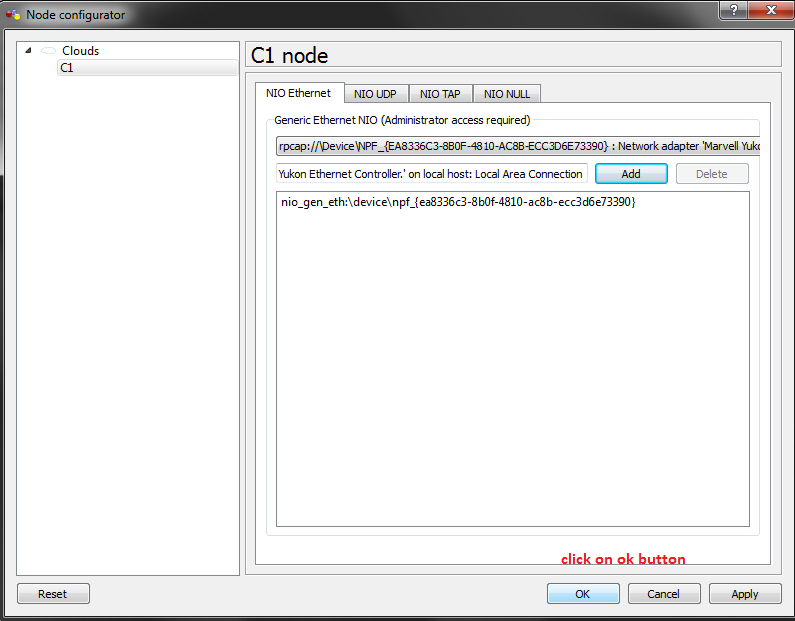
In open dialog select instance name C1 and scroll your physical interface (network car of hosting pc) – in this case there were 6 interfaces (look at next 2 pictures).
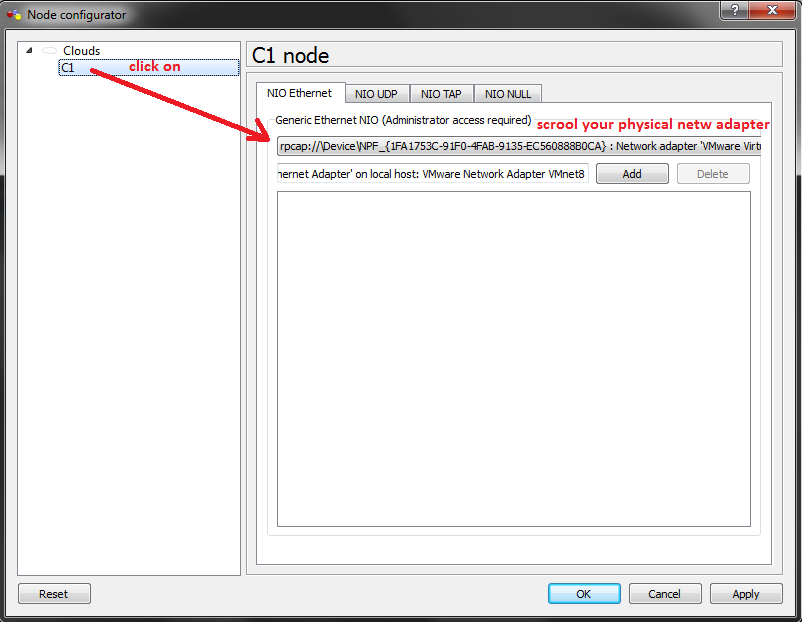
Then click add button and next ok.
With interconnected hosting (your) PC and simulation environment (that is in fact not a simulation but Virtualization for run real IOS – but switching concepts are poorly implemented) you can try SSH access to router as you can see on next photos. But prerequisite is that you from CCNA know how to enable SSH access to VTY line of your router with appropriate user account and local or radius authentication.

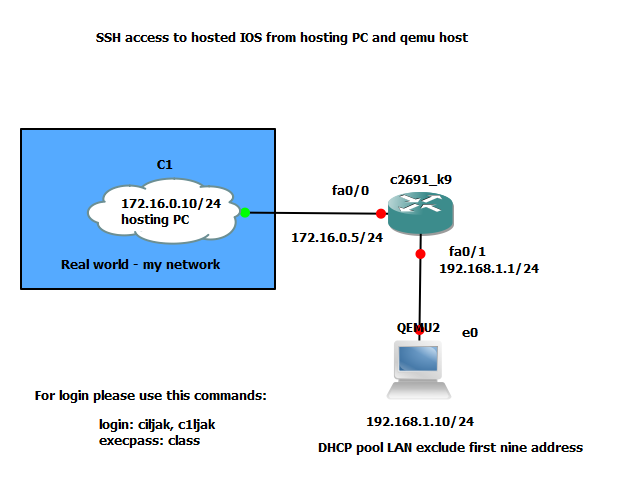
Config of router was